Dental X-Ray Positioning Guide ⏤ Article Plan (05/04/2026 09:56:07)
This guide details radiographic techniques for diagnostic quality images‚ optimizing patient care‚ and utilizing prior exams. Consistent positioning‚ beam angles‚ and film placement are crucial.
Dental radiography is vital for diagnostic imaging‚ enhancing patient outcomes‚ and utilizing previous exams effectively. Quality images require precise techniques and consistent protocols for optimal results.
Importance of Diagnostic Quality Images
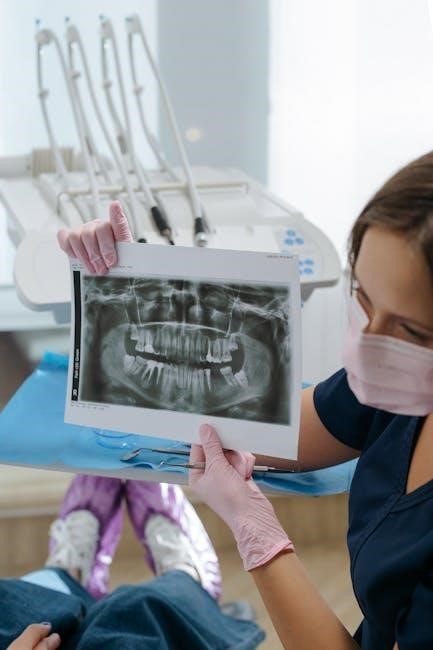
Achieving diagnostic quality in dental radiographs is paramount for accurate assessments and effective treatment planning. Clinicians rely on these images to identify pathologies‚ assess anatomical structures‚ and monitor treatment progress. Substandard images‚ plagued by distortion or poor contrast‚ can lead to misdiagnosis and compromised patient care.
Proper positioning‚ beam angulation‚ and exposure settings are all critical components in obtaining images suitable for interpretation. Factors like patient movement‚ incorrect film placement‚ and inadequate collimation can significantly degrade image quality. Therefore‚ a thorough understanding and meticulous application of radiographic principles are essential for every dental professional. The ability to consistently produce high-quality radiographs directly translates to improved diagnostic confidence and‚ ultimately‚ better patient outcomes.
Optimizing Patient Care with Radiographs
Dental radiographs are indispensable tools for optimizing patient care‚ extending far beyond simple cavity detection. They enable early identification of periodontal disease‚ apical lesions‚ impacted teeth‚ and even systemic conditions manifesting orally. Ordering radiographs strategically‚ focusing on diagnostic information needs‚ enhances treatment outcomes significantly.
Furthermore‚ leveraging images from previous dental exams minimizes patient radiation exposure while providing valuable comparative data. Employing digital radiography over conventional film offers advantages in image quality and reduced radiation. Restricting the X-ray beam using rectangular collimation further minimizes exposure‚ focusing radiation solely on the area of interest. Proper patient positioning ensures the best possible image‚ contributing to a more accurate diagnosis and a tailored treatment plan.
Utilizing Previous Dental Exams
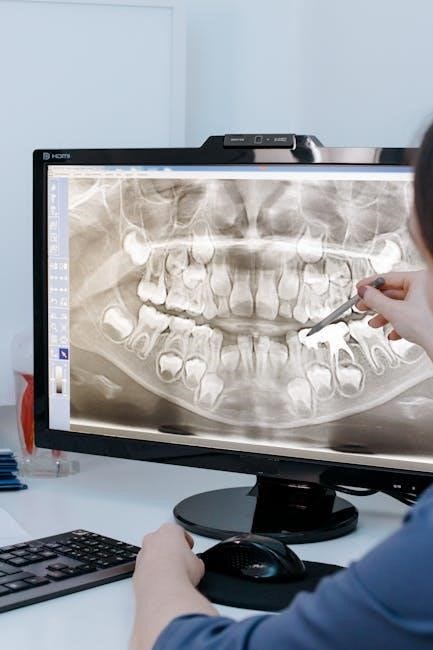
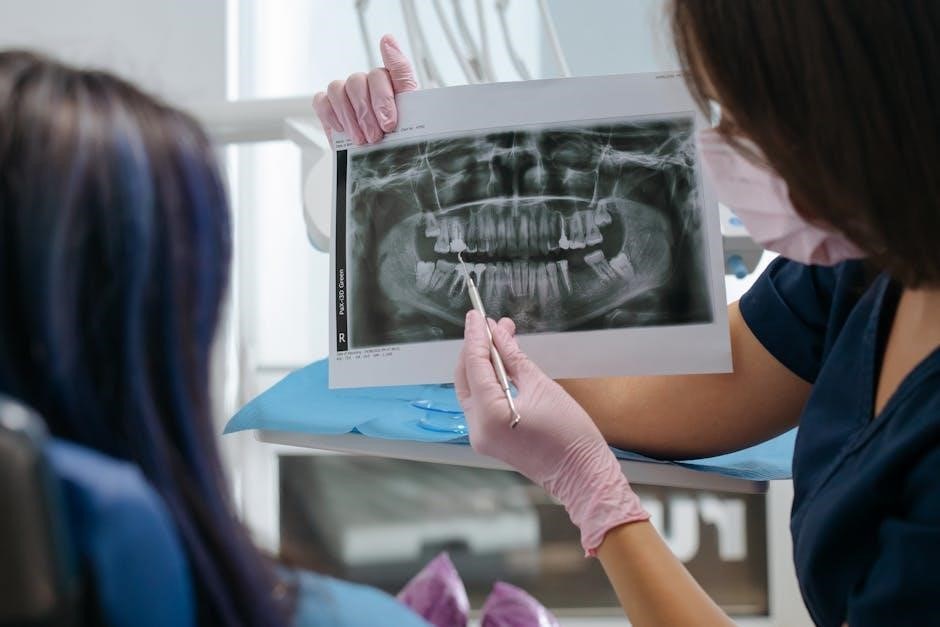
A cornerstone of responsible radiographic practice is the conscientious effort to utilize images acquired during previous dental examinations. Re-evaluating prior radiographs offers a baseline for comparison‚ allowing clinicians to detect subtle changes indicative of disease progression or treatment effectiveness. This approach minimizes redundant radiation exposure for the patient‚ adhering to the ALARA (As Low As Reasonably Achievable) principle.
Comparing current images with historical data aids in accurate diagnosis and treatment planning. It’s crucial to request and review these records before taking new radiographs. This practice demonstrates a commitment to patient safety and efficient healthcare delivery‚ streamlining the diagnostic process and reducing unnecessary imaging.
II. Patient Positioning Fundamentals
Consistent positioning is key for minimizing variables and achieving optimal image quality‚ whether viewing the mandibular or maxillary arcade‚ ensuring accurate diagnostics.
Consistent Positioning Approach
Maintaining a standardized approach to patient positioning is paramount in dental radiography. This minimizes inconsistencies and ensures comparability between radiographs taken at different times‚ or by different operators. By approaching each patient’s positioning in a similar manner – based on whether the mandibular or maxillary arcade is being imaged – we reduce variables that could compromise diagnostic quality.
This consistency extends to recumbency choices; sternal recumbency is often preferred for maxillary arcade views. A predictable routine allows for more accurate interpretation and facilitates the detection of subtle changes over time. Proper positioning directly impacts the ability to accurately assess dental structures and diagnose potential issues effectively.
Sternal Recumbency for Maxillary Arcade Views
Sternal recumbency‚ positioning the patient in a chest-down posture‚ is a favored technique for obtaining optimal views of the maxillary arcade. This position effectively aligns the dental structures‚ minimizing distortion and superimposition of anatomical features. It allows for a more parallel projection of the X-ray beam‚ crucial for accurate measurements and assessments.
The author specifically recommends this approach‚ highlighting its benefits in achieving diagnostic quality images. Proper stabilization in sternal recumbency is essential‚ ensuring the patient remains still throughout the exposure. This minimizes motion blur and enhances image clarity. Careful attention to head and neck positioning within this recumbency is vital for consistent‚ reliable results.
Patient Positioning for Optimal Imaging
Achieving optimal imaging hinges on a consistent and meticulous approach to patient positioning. Minimizing variables is paramount; each patient should be positioned similarly‚ tailored to whether mandibular or maxillary arcade views are required. The goal is to bring the area being imaged as close as possible to the radiographic beam‚ reducing magnification and distortion.
Proper positioning directly impacts diagnostic quality‚ enabling accurate interpretation of radiographs. This includes careful attention to head and neck alignment‚ ensuring a parallel projection of the X-ray beam. Consistent technique reduces errors and facilitates comparisons with previous examinations‚ aiding in longitudinal assessment and treatment planning.
III. Understanding X-Ray Beam Angles
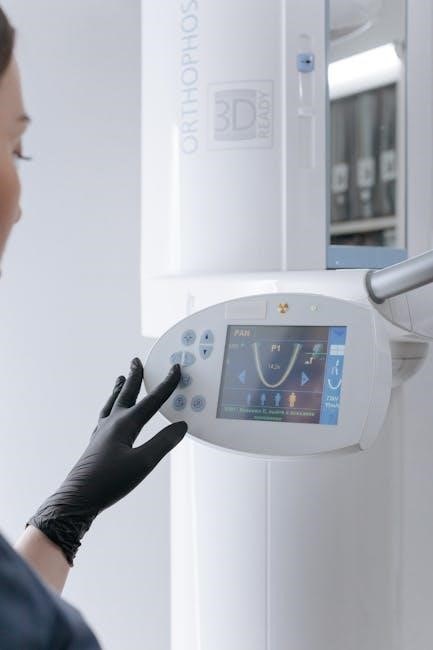
Beam angles‚ measured in degrees from the horizontal plane‚ are critical for accurate dental radiography. Precise tube head angle settings ensure optimal image quality.
Degrees from the Horizontal Plane
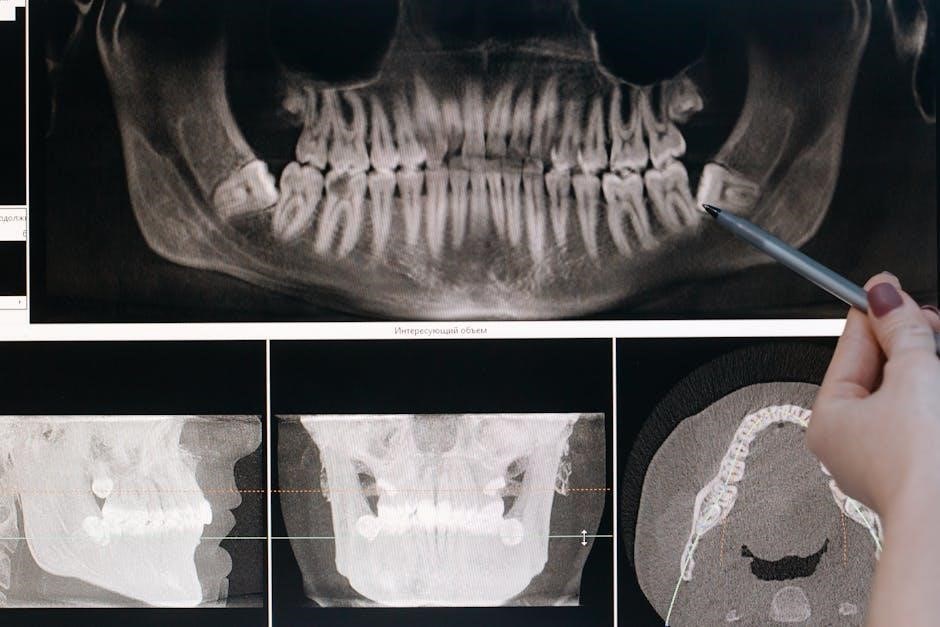
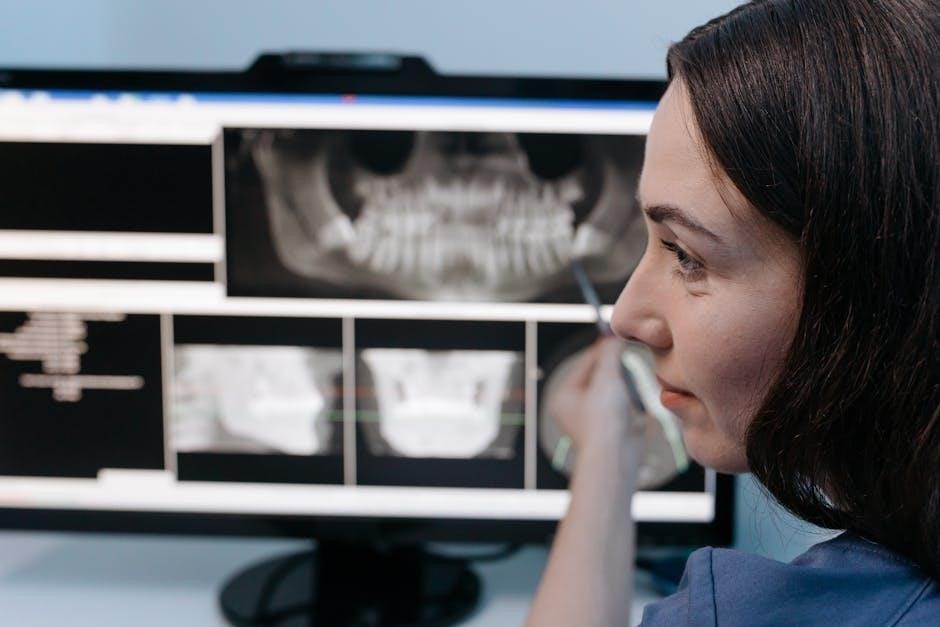
Understanding the measurement of X-ray beam angles‚ based on degrees from the horizontal plane‚ is fundamental to achieving diagnostic radiographic images. All dental radiography units utilize this system for precise targeting. Photos 3A and 3B visually demonstrate this concept‚ illustrating how adjustments to the tube head directly impact the angle of the X-ray beam.
These degree settings aren’t arbitrary; they are carefully calibrated to ensure the beam penetrates the oral structures at the correct angle‚ minimizing distortion and maximizing detail. Clinicians must be proficient in interpreting and adjusting these angles based on the specific radiographic technique being employed and the anatomical structures being imaged. Proper angle selection is paramount for accurate diagnosis and treatment planning.
Tube Head Angle Settings
Precise tube head angle settings are critical for optimal dental radiography. These settings‚ measured in degrees from the horizontal plane‚ dictate the direction of the X-ray beam and significantly influence image quality. Adjusting the angle alters the beam’s path‚ impacting how it interacts with the patient’s dental structures.
Clinicians must understand how different angles affect image distortion and resolution. Incorrect settings can lead to foreshortening‚ elongation‚ or superimposition of anatomical features‚ hindering accurate diagnosis. Mastering these adjustments requires practice and a thorough understanding of radiographic principles. Consistent application of correct angle settings ensures reliable and interpretable images‚ ultimately enhancing patient care and treatment outcomes.
IV. Core Positioning Techniques
Essential techniques include precise tongue placement for palatal contact‚ effective bite-block utilization within the tooth groove‚ and aligning the indicator light correctly.
Tongue Placement – Palatal Contact
Achieving proper tongue placement is fundamental to successful dental radiography. The tongue should be gently‚ but firmly‚ pressed against the palate – the roof of the mouth. This accomplishes several critical objectives. Firstly‚ it moves the tongue away from the path of the X-ray beam‚ preventing interference and ensuring a clearer image. Secondly‚ it flattens the tongue‚ creating more space for the film or sensor.
Furthermore‚ palatal contact helps to position the teeth accurately and minimizes distortion. Consistent tongue placement is vital for reproducible results across multiple radiographs. Remember to instruct the patient to maintain this position throughout the exposure. Proper tongue positioning‚ alongside bite-block use and indicator light alignment‚ is a cornerstone of diagnostic image quality.
Bite-Block Utilization – Tooth Groove
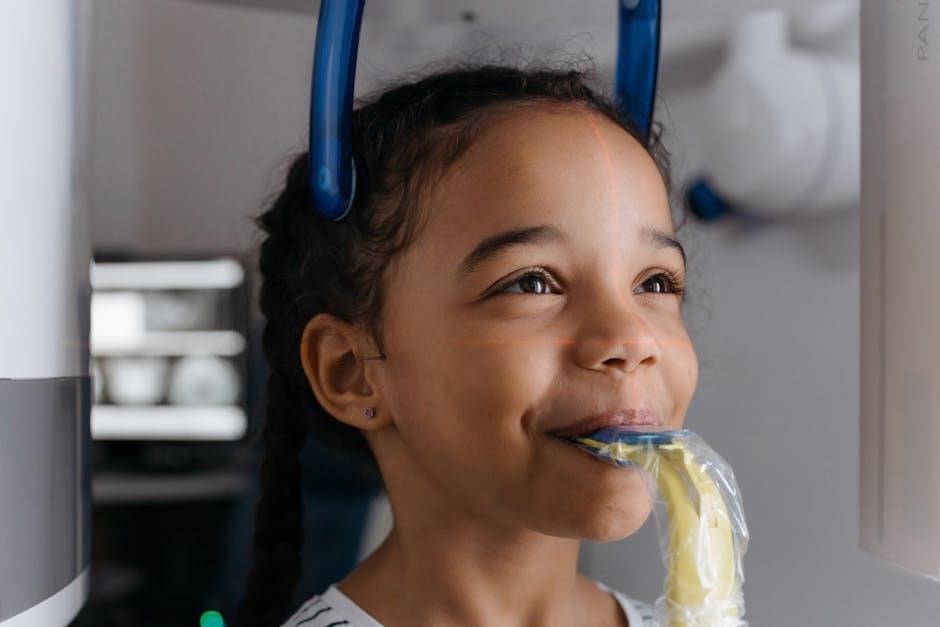
Employing a bite-block is essential for accurate dental radiographic positioning. The bite-block‚ typically made of plastic‚ provides stable support and ensures consistent vertical positioning of the patient’s teeth. Crucially‚ the patient should bite down so their teeth sit comfortably within the groove of the bite-block. This groove is designed to align the teeth parallel to the film or sensor‚ minimizing distortion and maximizing detail.
Correct bite-block usage also maintains a consistent distance between the source of the X-ray beam and the teeth. This is vital for image clarity and diagnostic accuracy. Ensure the bite-block is the appropriate size for the patient’s mouth and that it’s securely positioned. Combined with proper tongue placement‚ the bite-block is a key component of high-quality radiographic images.
Indicator Light Alignment – Midsagittal Plane
Precise alignment of the indicator light is paramount for accurate dental radiography. The indicator light‚ found on most dental X-ray units‚ projects a beam that defines the midsagittal plane – an imaginary vertical line dividing the patient’s face into equal left and right halves. This light must be centered and perpendicular to the floor during image acquisition.
Proper alignment ensures that both sides of the dental arch are equally exposed‚ minimizing distortion and providing a symmetrical radiographic image. Clinicians should carefully observe the light’s position before each exposure‚ adjusting patient positioning as needed. This simple step significantly improves diagnostic quality and reduces the need for retakes‚ ultimately benefiting both the patient and the practitioner.

V. Film/Sensor Placement
Correct film/sensor placement is vital‚ identifying the convex side and ensuring complete tooth coverage – crown and root – with rectangular collimation for optimal results.
Convex Side Identification
Accurate film or sensor orientation is paramount for a diagnostically useful radiograph. The convex side of the film‚ which faces the palate or buccal surface depending on the view‚ must be correctly positioned. Typically‚ this side is visually distinguished by a colored marking – commonly purple or green – providing a quick and reliable identification method for the operator.
Failing to correctly identify and position the convex side will result in image distortion and potentially misdiagnosis. Understanding this simple‚ yet critical‚ detail ensures the radiographic image accurately represents the patient’s dental anatomy. Consistent attention to this detail significantly improves the overall quality and reliability of the radiographic examination.
Complete Tooth Coverage (Crown & Root)
Achieving complete tooth coverage on the radiograph – encompassing both the crown and the entire root surface – is essential for a comprehensive dental assessment. Incomplete coverage obscures vital periapical structures‚ hindering the detection of pathologies like abscesses or bone loss. Proper film or sensor placement‚ guided by accurate angulation and patient positioning‚ is crucial to visualize the full length of the tooth.
Careful attention to these details ensures that no critical anatomical features are cut off‚ allowing for a thorough evaluation of the tooth and its surrounding tissues. This complete visualization is fundamental for accurate diagnosis and effective treatment planning.
Rectangular Collimation – Beam Restriction
Rectangular collimation is a vital technique in dental radiography‚ focusing the X-ray beam solely on the area requiring assessment. This beam restriction significantly minimizes patient exposure to radiation‚ adhering to the ALARA (As Low As Reasonably Achievable) principle. By limiting the beam size to the specific tooth or region of interest‚ unnecessary radiation scatter is reduced‚ enhancing image quality and diagnostic accuracy.
Employing rectangular collimation demonstrates a commitment to patient safety and responsible radiographic practices. It’s a simple yet impactful adjustment that contributes to a safer and more effective diagnostic process.

VI. Recumbency Positions
Sternal‚ dorsal‚ and lateral recumbency are key positioning techniques‚ each offering unique advantages for optimal dental radiographic imaging and sensor placement.
Sternal Recumbency – Detailed Explanation
Sternal recumbency is a preferred method for maxillary arcade views‚ offering excellent patient stability and radiographic accuracy. This position involves the patient lying on their sternum‚ ensuring a flat and consistent plane for imaging. Proper head support is vital‚ maintaining alignment with the radiographic beam.
The author emphasizes approaching positioning consistently for each patient‚ regardless of arcade. This minimizes variables and ensures comparable image quality. Careful attention to detail during sternal recumbency allows for precise beam angulation and accurate sensor placement. It’s crucial to position the area being imaged closest to the radiographic beam for optimal results. This technique facilitates clear visualization of the maxillary teeth and supporting structures.
Dorsal Recumbency – Considerations
Dorsal recumbency‚ positioning the patient on their back‚ presents unique challenges for dental radiography. Maintaining proper head and neck alignment is paramount to avoid distortion and ensure accurate image representation. Gravity can affect tongue placement and sensor positioning‚ requiring careful management.
Unlike sternal recumbency‚ dorsal positioning may necessitate additional support to prevent the tongue from obstructing the palate. Clinicians must diligently ensure the area being imaged is closest to the beam. While less frequently favored for maxillary views‚ dorsal recumbency can be useful in specific cases. Careful consideration of these factors is essential for obtaining diagnostic quality radiographs in this position.
Lateral Recumbency – Applications
Lateral recumbency‚ with the patient lying on their side‚ offers specific applications in veterinary dental radiography‚ particularly when other positions are contraindicated or impractical. This position is often utilized for imaging patients with compromised respiratory or cardiovascular systems‚ minimizing stress.
Achieving accurate positioning requires careful attention to head stabilization and preventing rotation. The clinician must ensure the radiographic beam is directed perpendicular to the tooth and sensor‚ avoiding superimposition. Proper tongue placement and bite-block utilization remain crucial. While less common for routine dental surveys‚ lateral recumbency provides a valuable alternative when standard techniques are limited.
VII. Digital vs. Conventional Radiography
Digital X-rays offer advantages over conventional film‚ including immediate image viewing‚ reduced radiation‚ and enhanced diagnostic capabilities for optimal patient care.
Advantages of Digital X-Ray Film
Digital radiography presents numerous benefits compared to traditional film-based systems. Primarily‚ digital sensors offer immediate image availability‚ eliminating the development time associated with conventional film. This allows for quicker diagnosis and treatment planning‚ enhancing patient care efficiency. Furthermore‚ digital systems typically require significantly less radiation exposure to achieve comparable image quality‚ prioritizing patient safety.
Image manipulation capabilities are another key advantage. Digital images can be easily enhanced – adjusting brightness‚ contrast‚ and magnification – to reveal subtle details that might be missed on conventional radiographs. Storage is also simplified‚ as digital images are stored electronically‚ reducing the need for extensive physical archiving. Finally‚ digital images facilitate seamless sharing with specialists for collaborative consultations‚ improving diagnostic accuracy and treatment outcomes.
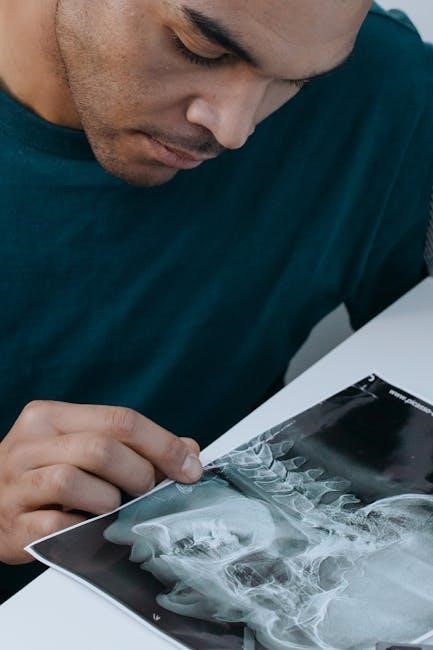
Conventional Film Considerations
While digital radiography is increasingly prevalent‚ conventional film remains a viable option‚ demanding meticulous technique. Proper film handling is paramount; avoid light exposure before processing‚ as this causes fogging and image degradation. Careful attention to processing times and temperatures is crucial for consistent results – deviations can lead to under or overdevelopment‚ impacting diagnostic quality.
Archiving conventional radiographs requires dedicated space and organization to prevent damage or loss. Furthermore‚ conventional film necessitates a darkroom setup with appropriate chemicals and safety protocols. Radiation exposure is generally higher with conventional film compared to digital sensors‚ necessitating strict adherence to ALARA principles (As Low As Reasonably Achievable). Despite these considerations‚ skilled technicians can still produce valuable diagnostic images using conventional film.
VIII. Further Training & Skill Development
Hands-on laboratory practice is essential for mastering dental radiography techniques and accelerating the learning curve for optimal image acquisition.
Hands-on Laboratory Importance
Practical experience in a laboratory setting is invaluable for solidifying theoretical knowledge of dental radiography. It allows for repeated practice of patient positioning – sternal‚ dorsal‚ and lateral recumbency – without the pressures of a clinical environment.
This dedicated practice refines the ability to consistently achieve optimal imaging‚ focusing on correct tongue placement against the palate‚ accurate bite-block utilization‚ and precise indicator light alignment.
Furthermore‚ hands-on labs provide opportunities to master film/sensor placement‚ ensuring complete tooth coverage (crown and root) and proper convex side identification. Students can also practice rectangular collimation techniques to restrict the beam effectively.
Ultimately‚ this focused training significantly improves the learning curve and builds confidence in producing diagnostic-quality radiographs.
Improving the Learning Curve
Accelerating proficiency in dental radiography requires a multifaceted approach beyond initial training. Consistent application of standardized positioning techniques – regardless of the patient or arcade being imaged – is paramount;
Regular self-assessment‚ reviewing acquired images for errors in beam angle‚ film placement‚ or patient positioning‚ is crucial. Seeking feedback from experienced colleagues or mentors provides valuable insights.
Understanding the principles of digital versus conventional radiography aids in optimizing image quality.
Remembering the importance of minimizing variables and focusing on consistent technique‚ alongside dedicated hands-on practice‚ will dramatically improve skill and confidence in producing consistently diagnostic radiographs‚ ultimately enhancing patient care.