
Welcome to the Audio-Technica Turntable Manual, your comprehensive guide to setting up, operating, and maintaining your turntable. This manual provides detailed instructions for optimal performance and troubleshooting.
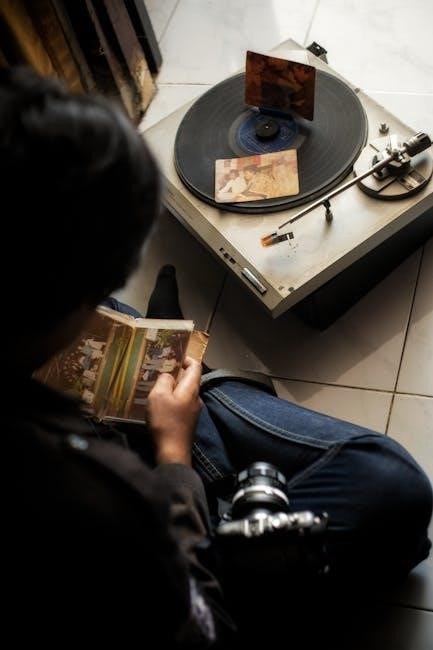
Welcome to the World of Vinyl
Welcome to the world of vinyl, where music comes alive with warmth and richness. Audio-Technica turntables invite you to experience the tactile joy of playing records. Vinyl offers a unique sensory experience, combining visual artistry with immersive sound. Whether you’re a seasoned collector or a first-time listener, this manual guides you through setting up and enjoying your turntable. Discover the craftsmanship and precision that make Audio-Technica a trusted name in vinyl playback. Let your musical journey begin here.
Understanding the Purpose of the Manual
This manual serves as your essential guide for setting up, operating, and maintaining your Audio-Technica turntable. It provides detailed instructions to help you achieve optimal performance and troubleshoot common issues. Designed for both newcomers and experienced users, the manual covers everything from unpacking to advanced features. By following these guidelines, you can ensure your turntable operates at its best, delivering high-quality sound and lasting durability. Refer to this manual for comprehensive support in enjoying your vinyl collection to the fullest.
Key Features of Audio-Technica Turntables
Audio-Technica turntables are renowned for their precision engineering and advanced features, ensuring exceptional sound quality. They feature a sturdy aluminum platter, S-shaped tonearm with adjustable tracking force, and high-fidelity cartridges like the AT-VM95E. Many models offer direct-drive motors for stable rotation and USB/Bluetooth connectivity for modern convenience. Additional features include built-in phono pre-amps, multiple speed settings, and durable construction. These turntables cater to both casual listeners and audiophiles, blending tradition with innovation for an unparalleled vinyl experience.
About Audio-Technica Turntables
Audio-Technica turntables are high-quality devices designed for music enthusiasts, offering precise engineering and advanced technology for exceptional sound. Renowned for their durability and innovative features, they cater to both casual listeners and professionals, providing a seamless vinyl experience.
History and Reputation of Audio-Technica
Audio-Technica was founded in 1962, initially specializing in phono cartridges. Over the decades, the brand has grown into a global leader in audio equipment, celebrated for its commitment to innovation and quality. Known for producing high-fidelity turntables, Audio-Technica has earned a reputation for delivering reliable, durable, and sonically superior products. Their turntables are favored by audiophiles, DJs, and vinyl enthusiasts worldwide, reflecting the company’s dedication to preserving the richness of analog sound while embracing modern technology.
Product Line Overview
Audio-Technica offers a diverse range of turntables to cater to various needs and preferences. From entry-level models like the AT-LP60XBT to professional-grade options such as the AT-LP120XUSB, their product line delivers exceptional sound quality and durability. The turntables feature advanced technologies like direct-drive motors, USB connectivity, and Bluetooth compatibility, ensuring versatility for both analog and digital music enthusiasts. Whether for casual listening or professional use, Audio-Technica provides a turntable to suit every requirement, backed by comprehensive user manuals for seamless setup and operation.
Why Choose Audio-Technica Turntables?
Audio-Technica turntables are a top choice for music enthusiasts due to their exceptional sound quality, durability, and innovative features. With a legacy of precision engineering, they offer models for every listener, from entry-level to professional. Advanced technologies like direct-drive motors and high-fidelity cartridges ensure superior performance. Their turntables also feature versatile connectivity options, including USB and Bluetooth, making them ideal for both analog and digital music experiences. Audio-Technica combines reliability and innovation, providing a turntable that enhances your vinyl journey.
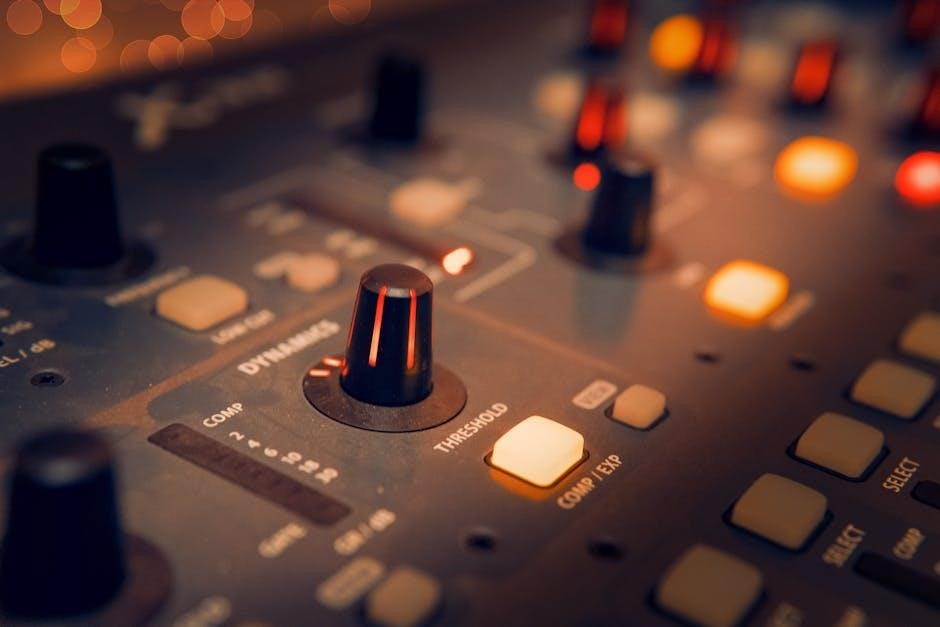
Components of the Audio-Technica Turntable
The turntable features a sturdy platter, precision-crafted tonearm, and high-quality cartridge for optimal sound reproduction. The motor ensures stable rotation, while additional features like USB and Bluetooth enhance connectivity.
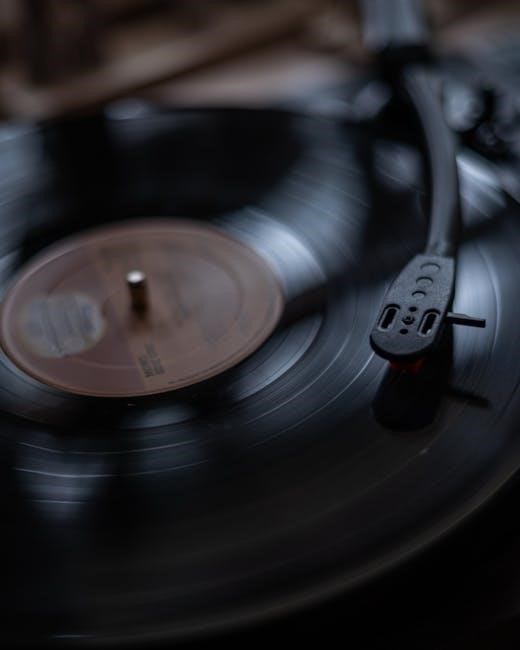
Platter and Drive System
The platter is a critical component, typically made of aluminum or acrylic, ensuring stable and consistent record playback. The drive system varies between models, with belt-drive turntables offering reduced vibration and direct-drive designs providing precise speed control. The platter is paired with a drive belt or direct motor coupling, depending on the model. Proper alignment and maintenance of the platter and drive system are essential for optimal performance and longevity. Regular inspection of the drive belt for wear is recommended.
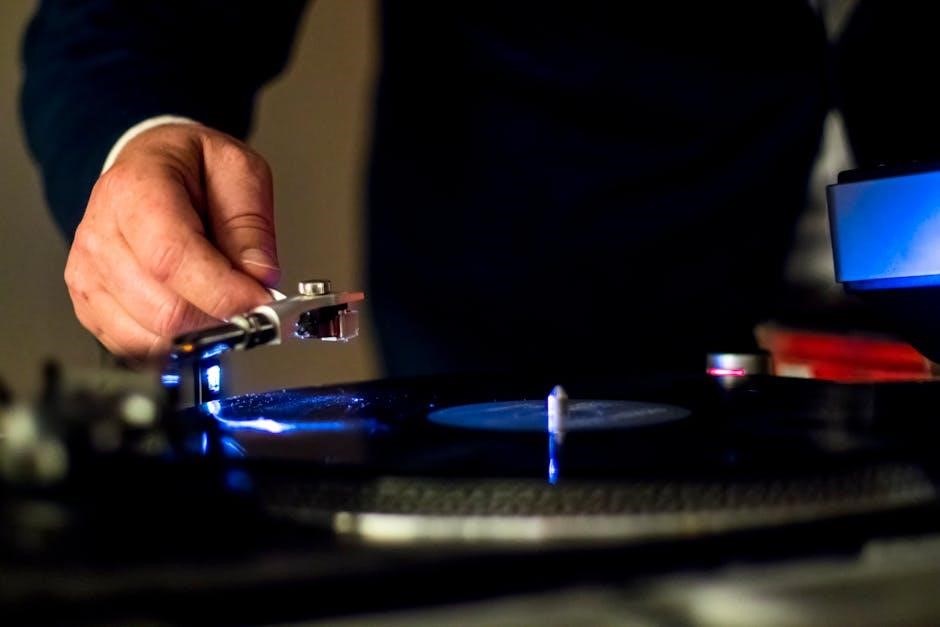
Tonearm and Cartridge
The tonearm is designed for optimal tracking and sound reproduction. Audio-Technica turntables feature an S-shaped or straight tonearm with adjustable tracking force to ensure proper stylus alignment. The cartridge, such as the AT-VM95E, is pre-mounted and delivers high-fidelity audio. Regular dusting of the cartridge and checking the tonearm balance are crucial for maintaining sound quality. The cartridge is replaceable, allowing users to upgrade or replace it as needed for continued performance.
Motor and Speed Control
Audio-Technica turntables feature high-quality motors designed for smooth operation and consistent speed. Direct-drive models, like the AT-LP120XUSB, offer precise control and quick start-up. Belt-drive turntables provide reduced vibration and noise. Speed control allows switching between 33 1/3, 45, and 78 RPM, ensuring compatibility with various record formats. Manual adjustment options enable fine-tuning for optimal performance. The motor is built for durability, delivering stable rotation for accurate sound reproduction. Proper speed control ensures your records play at the correct pitch, enhancing the listening experience.
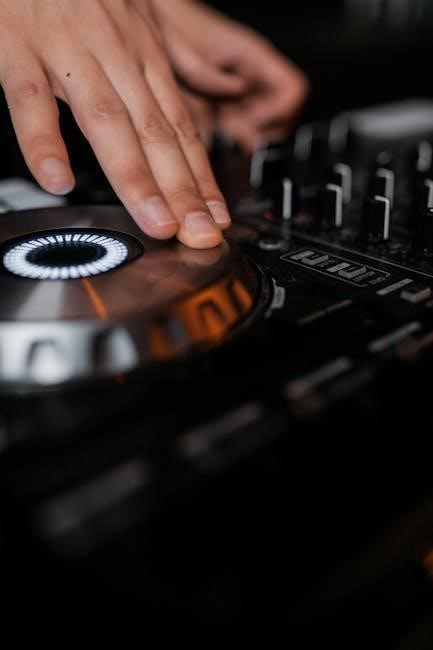
Additional Features (USB, Bluetooth, etc.)
Audio-Technica turntables often include advanced features like USB connectivity for digitizing vinyl records and Bluetooth for wireless streaming. The AT-LP120XBT-USB model, for instance, supports Bluetooth, allowing seamless connection to speakers or headphones. USB output enables direct recording to computers via Audacity software. Some turntables also feature built-in phono pre-amplifiers, eliminating the need for external equipment. These features enhance versatility, making it easier to integrate modern technology with traditional vinyl playback. They cater to both casual listeners and audiophiles, ensuring a comprehensive and adaptable listening experience.

Setting Up Your Audio-Technica Turntable
Setting up your turntable involves unpacking, placing it on a stable surface, attaching the platter and drive belt, and balancing the tonearm. Follow the manual for precise steps.
Unpacking and Initial Inspection
Begin by carefully unpacking your Audio-Technica turntable and inspecting all components. Ensure the package includes the turntable body, platter, drive belt, felt mat, counterweight, and accessories. Check for any visible damage or missing items. Refer to the manual’s packing list to confirm all parts are included. If any items are damaged or missing, contact your local Audio-Technica dealer immediately. This step ensures your turntable is ready for proper setup and optimal performance.
Placing the Turntable
To ensure optimal performance, place your Audio-Technica turntable on a stable, flat surface, away from direct sunlight and vibrations. Avoid areas near speakers or appliances that may cause resonance. Position the turntable on a level surface to maintain proper platter alignment. Use the provided leveling adjustments if necessary. Ensure good ventilation around the unit to prevent overheating. Finally, place the turntable in a convenient location for easy access to records and connections, ensuring all cables are neatly managed for a clean setup.
Attaching the Platter and Drive Belt
Begin by carefully placing the platter onto the center spindle of the turntable, ensuring it is securely seated. Next, locate the drive belt and gently loop it around the motor pulley, aligning it with the platter’s edge. Ensure the belt is properly seated and evenly tensioned for smooth operation. Refer to your specific model’s manual for any additional steps, as some turntables may have slight variations in this process. Proper installation is essential for consistent speed and optimal performance.
Balancing the Tonearm
Begin by removing the cartridge and stylus guard to avoid damage. Gently slide the tonearm counterweight outward until it balances evenly without touching the record. Use the Allen wrench to adjust the counterweight, ensuring the tonearm floats level. Set the tracking force according to the manufacturer’s specifications, typically between 1.5 to 2.5 grams. Proper balance ensures optimal sound quality and reduces wear on the stylus and record. Refer to your model’s manual for specific tracking force recommendations and adjustment instructions.
Operating the Turntable
Mastering your Audio-Technica turntable is simple. Learn to play records, adjust speed, and use features like USB and Bluetooth connectivity with ease. Essential controls and settings ensure optimal playback.
Playing Your First Record
Start by placing the turntable on a flat, stable surface. Ensure the platter is clean and free from dust. Locate the power switch and gently turn it on. Carefully lift the tonearm and place it at the edge of the record using the cue lever for smooth, damage-free placement. Allow the record to play, adjusting the volume on your connected audio system. Always handle the tonearm with care to avoid scratching your records or damaging the cartridge. Refer to your manual for specific model instructions.
Adjusting Speed and Pitch
To ensure accurate playback, adjust the turntable’s speed using the rotation speed buttons (33-1/3 or 45 RPM). For precise pitch control, use the pitch slider to fine-tune the speed. The AT-LP120XUSB features a strobe light to help calibrate the platter’s rotation speed. Simply align the strobe with the speed indicator on the edge of the platter. For minor adjustments, use the pitch adjustment knob to match the desired tempo. Always refer to your manual for specific instructions on how to adjust these settings for optimal performance.
Using USB and Bluetooth Connectivity
Connect your Audio-Technica turntable to external devices seamlessly using USB and Bluetooth. For USB connectivity, plug the cable into your computer to digitize records. Enable Bluetooth on your turntable and pair it with compatible speakers or devices. Models like the AT-LP120XBT support wireless streaming. Follow the manual’s pairing instructions for a smooth connection. These features allow easy integration with modern audio systems, enhancing your vinyl listening experience while maintaining high-quality sound reproduction. Refer to your turntable’s manual for specific pairing and connection guidelines.
Switching Between Phono and Line Outputs
To switch between Phono and Line outputs on your Audio-Technica turntable, locate the Phono/Line switch near the RCA output jacks. Ensure the turntable is powered off before switching to prevent electrical issues. If using Phono output, connect to a phono input on your amplifier. For Line output, connect to a standard auxiliary input, typically used when a built-in preamp is present. Refer to your manual for specific instructions, as procedures may vary between models. After switching, test the audio connection to ensure proper sound quality.
Maintenance and Care
Regularly clean the platter, tonearm, and cartridge to ensure optimal performance. Check and replace the drive belt as needed. Dust and debris can affect sound quality and longevity.
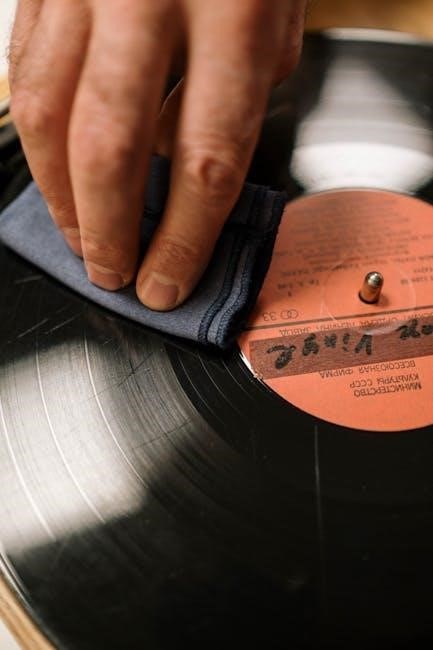
Cleaning the Platter and Rotor
To maintain optimal performance, regularly clean the platter and rotor. Remove the mat and gently wipe the platter with a soft, dry cloth. For stubborn debris, dampen the cloth slightly but avoid harsh chemicals. Ensure the rotor is free from dust and particles. Use compressed air cautiously to remove dust from the rotor area. Never immerse the platter or rotor in water or use abrasive cleaners, as this could damage the finish or components. Always refer to the manual for specific cleaning recommendations.
Dusting the Tonearm and Cartridge
Regularly dusting the tonearm and cartridge is essential for maintaining sound quality. Use compressed air to gently remove dust from the tonearm. For the cartridge, employ a soft, dry brush or a cotton swab to wipe away debris. Avoid touching the stylus tip, as oils from your skin can damage it. Dusting ensures optimal tracking force and prevents skips or distorted sound. Clean the tonearm periodically to remove particles that may interfere with its movement. Always handle the cartridge by the edges to avoid damage.
Replacing the Drive Belt
Replacing the drive belt ensures consistent platter rotation and optimal playback. Purchase a replacement belt compatible with your Audio-Technica model. Remove the old belt by gently lifting it off the pulley and motor shaft. Clean the area to remove dust or debris. Install the new belt, stretching it slightly to fit securely. Ensure proper alignment for even tension. After installation, test the turntable to confirm smooth operation. Refer to your specific model’s manual for detailed instructions, as procedures may vary slightly between models. Always use genuine or recommended replacement parts for longevity.
Upgrading the Phono Cartridge
Upgrading the phono cartridge enhances sound quality and expands your turntable’s capabilities. Start by removing the old cartridge from the tonearm, ensuring proper handling to avoid damage. Install the new cartridge, aligning it securely in the headshell. Adjust the tracking force and anti-skate settings according to the cartridge’s specifications. Use a protractor tool for accurate alignment. Finally, test the turntable to ensure proper playback and clear sound reproduction. Always follow the manufacturer’s instructions for compatibility and installation procedures.

Troubleshooting Common Issues
Common issues with turntables include vibration, distorted sound, and the turntable not spinning. Check the balance, clean the cartridge, and ensure proper motor function. For distorted sound, adjust tracking force and alignment. If the turntable doesn’t spin, inspect the belt and motor. Refer to the manual for detailed solutions and maintenance tips to prevent future problems.
Resolving Vibration Problems
Vibrations can disrupt sound quality. Ensure the turntable is placed on a level, stable surface. Use isolation pads or a dampening mat to reduce external vibrations. Check the platter and motor for proper alignment. If using a belt-drive model, inspect the belt for wear. For direct-drive turntables, ensure the motor is clean and free of debris. Refer to the manual for specific adjustments. Proper setup and maintenance are key to minimizing vibrations and optimizing performance.
Fixing Distorted Sound
Distorted sound can result from improper tracking force or misaligned cartridges. Adjust the tonearm balance and tracking force as per the manual. Ensure the cartridge is securely mounted and aligned. Clean the stylus with a soft brush to remove debris. Check the phono cable connections and ensure they are secure. Verify that the turntable speed is set correctly for the record being played. If issues persist, refer to the troubleshooting section or consider upgrading the phono cartridge for improved sound quality.
Addressing Turntable Not Spinning
If your Audio-Technica turntable is not spinning, first ensure it is properly plugged in and the power switch is turned on. Check that the speed selector is set to the correct RPM for your record. Inspect the drive belt for damage or misalignment and ensure the platter is securely attached. Verify that the motor is functioning by observing any LED indicators or listening for motor noise. If the issue persists, clean the motor area gently and consult the troubleshooting section of the manual for further guidance. Contact Audio-Technica support if the problem remains unresolved.
Dealing with Cartridge Wear
If you notice decreased sound quality or increased surface noise, it may indicate cartridge wear. Regularly inspect the stylus for visible damage or dust buildup. Clean the cartridge gently with a soft brush or compressed air. For severe wear, replace the cartridge with a compatible model, following the instructions in the manual. Ensure proper alignment and tracking force after installation. Audio-Technica recommends replacing the cartridge every 500-1000 hours of use to maintain optimal performance and protect your records from damage.
Advanced Features and Upgrades
Explore phono cartridge options for enhanced sound quality and customize your turntable to suit your listening preferences. Discover how to add a pre-amp or upgrade the headshell for improved performance.
Exploring Phono Cartridge Options
The Audio-Technica turntable manual highlights the importance of phono cartridges in sound quality. Models like the AT-VM95E offer a Dual Moving Magnet design with a 0.3 x 0.7 mil elliptical stylus for precise tracking. Upgrading to a Shibata stylus can enhance high-frequency response. Users can choose from a variety of cartridges to suit their musical preferences, ensuring optimal performance. For detailed guidance on cartridge replacement and setup, refer to the manual or manufacturer’s instructions. Always handle the stylus gently to avoid damage and maintain sound integrity.
Understanding Direct Drive vs. Belt Drive
Audio-Technica turntables offer both direct drive and belt drive options. Direct drive systems, like the AT-LP120XUSB, provide instant torque and faster start-up, ideal for DJs. Belt drive models, such as the AT-LP60XBT, use a rubber belt to reduce motor vibration, offering quieter operation and better sound quality. Each design caters to different needs: direct drive for performance and belt drive for audiophile-grade listening. Choose based on your preference for speed, sound purity, or versatility.
Adding a Pre-Amp or External Phono Stage
Enhance your Audio-Technica turntable’s sound quality by adding a pre-amp or external phono stage. This component boosts the low-level phono signal to a line-level signal, improving sound clarity and depth. Many Audio-Technica models, like the AT-LP60XBT, have a built-in phono preamp, but for higher fidelity, consider an external unit. Connect the turntable’s output to the pre-amp, then to your amplifier or receiver. Ensure proper grounding to eliminate hum. This upgrade is ideal for audiophiles seeking refined audio performance and greater control over their listening experience.
Customizing Your Turntable
Customizing your Audio-Technica turntable allows you to tailor its performance and aesthetics to your preferences. Consider upgrading the platter mat for improved sound reproduction or replacing the drive belt for enhanced speed stability. Additionally, you can swap the phono cartridge to suit your musical tastes, with options like the AT-VM95E for versatility. For a personalized touch, explore aesthetic modifications such as custom platters or tonearm upgrades. These customizations can elevate your turntable’s functionality and visual appeal, ensuring it aligns with your unique listening experience.
Safety Precautions and Warranty
Always follow safety precautions to avoid damage or injury. Handle the turntable with care, and keep it away from liquids. Refer to the warranty for coverage details.
Important Safety Information
Welcome to the Audio-Technica Turntable Manual. To ensure safe and optimal use, read this section carefully. Handle the turntable with care to avoid damage or injury. Keep it away from liquids, extreme temperatures, and direct sunlight. Avoid overloading the platter or using damaged records. Always unplug the power cord when cleaning or performing maintenance. Follow all instructions in this manual to prevent accidents. For more details, refer to the warranty and support information provided.
Do’s and Don’ts for Turntable Use
Always place your turntable on a stable, flat surface away from vibrations. Use a clean, dry cloth to wipe the platter and tonearm regularly. Keep the turntable away from direct sunlight and moisture. Use high-quality cartridges and replace them as needed. Follow the manual for proper setup and operation. Avoid touching the stylus or records with bare hands. Never overload the platter with excessive weight. Don’t expose the turntable to extreme temperatures or humidity. Handle the turntable gently to prevent damage and ensure optimal performance.
Warranty and Support Information
Audio-Technica turntables are backed by a limited warranty covering manufacturing defects for a specified period. Register your product online to activate warranty benefits. For support, contact Audio-Technica via their official website or call their customer service at 330-686-2600. Visit www.audio-technica.com for detailed warranty terms, FAQs, and downloadable manuals. Keep your proof of purchase for warranty claims. For repairs or replacements, contact authorized dealers or service centers only.
Proper Disposal Guidelines
When disposing of your Audio-Technica turntable, ensure environmentally responsible practices. Check local regulations for e-waste disposal options. Separate components like motors or cartridges that may contain hazardous materials. Many communities offer electronics recycling programs. Do not dispose of the turntable in regular trash, as it may contain harmful materials. Consider donating functional units to charities or schools. For non-functional items, contact certified e-waste facilities. Proper disposal helps protect the environment and conserves resources. Always follow local guidelines for responsible electronics disposal.
Congratulations! You’ve successfully set up and explored your Audio-Technica turntable. Enjoy the rich, authentic sound of vinyl and continue discovering the joy of music with your new setup.
Enjoying Your Audio-Technica Turntable
Welcome to the world of vinyl! Your Audio-Technica turntable is designed to deliver high-quality sound, immersing you in the warmth and richness of your record collection. With its precision-crafted components, such as the AT-VM95E phono cartridge and built-in headphone amplifier, you can enjoy private listening sessions or share the experience with others. Whether you’re a casual listener or an audiophile, the turntable’s intuitive controls and advanced features like Bluetooth and USB connectivity make it easy to elevate your music experience. Proper care and maintenance will ensure years of enjoyment, so refer to the manual for tips on keeping your turntable in prime condition. Explore the endless possibilities of vinyl and discover the joy of listening with Audio-Technica.
Continuing Your Vinyl Journey
Your Audio-Technica turntable is the perfect gateway to exploring the world of vinyl. As you delve deeper, consider expanding your record collection and experimenting with different genres. Upgrade your setup by exploring phono cartridge options or adding a pre-amp for enhanced sound quality. Join vinyl communities to share discoveries and learn from fellow enthusiasts. Regular maintenance, like cleaning and replacing parts, will ensure your turntable continues to perform at its best. Embrace the journey and enjoy the timeless charm of vinyl with Audio-Technica.